
PHP is the language most websites (including WordPress) run on. Newer versions are faster and safer, and some themes and plugins refuse to work on old ones. On ZedgeHost you can change your PHP version yourself — it takes under a minute.
✅ Before you start
- You need to be logged in to cPanel
- The current server version is PHP 8.2 — recommended for modern WordPress sites
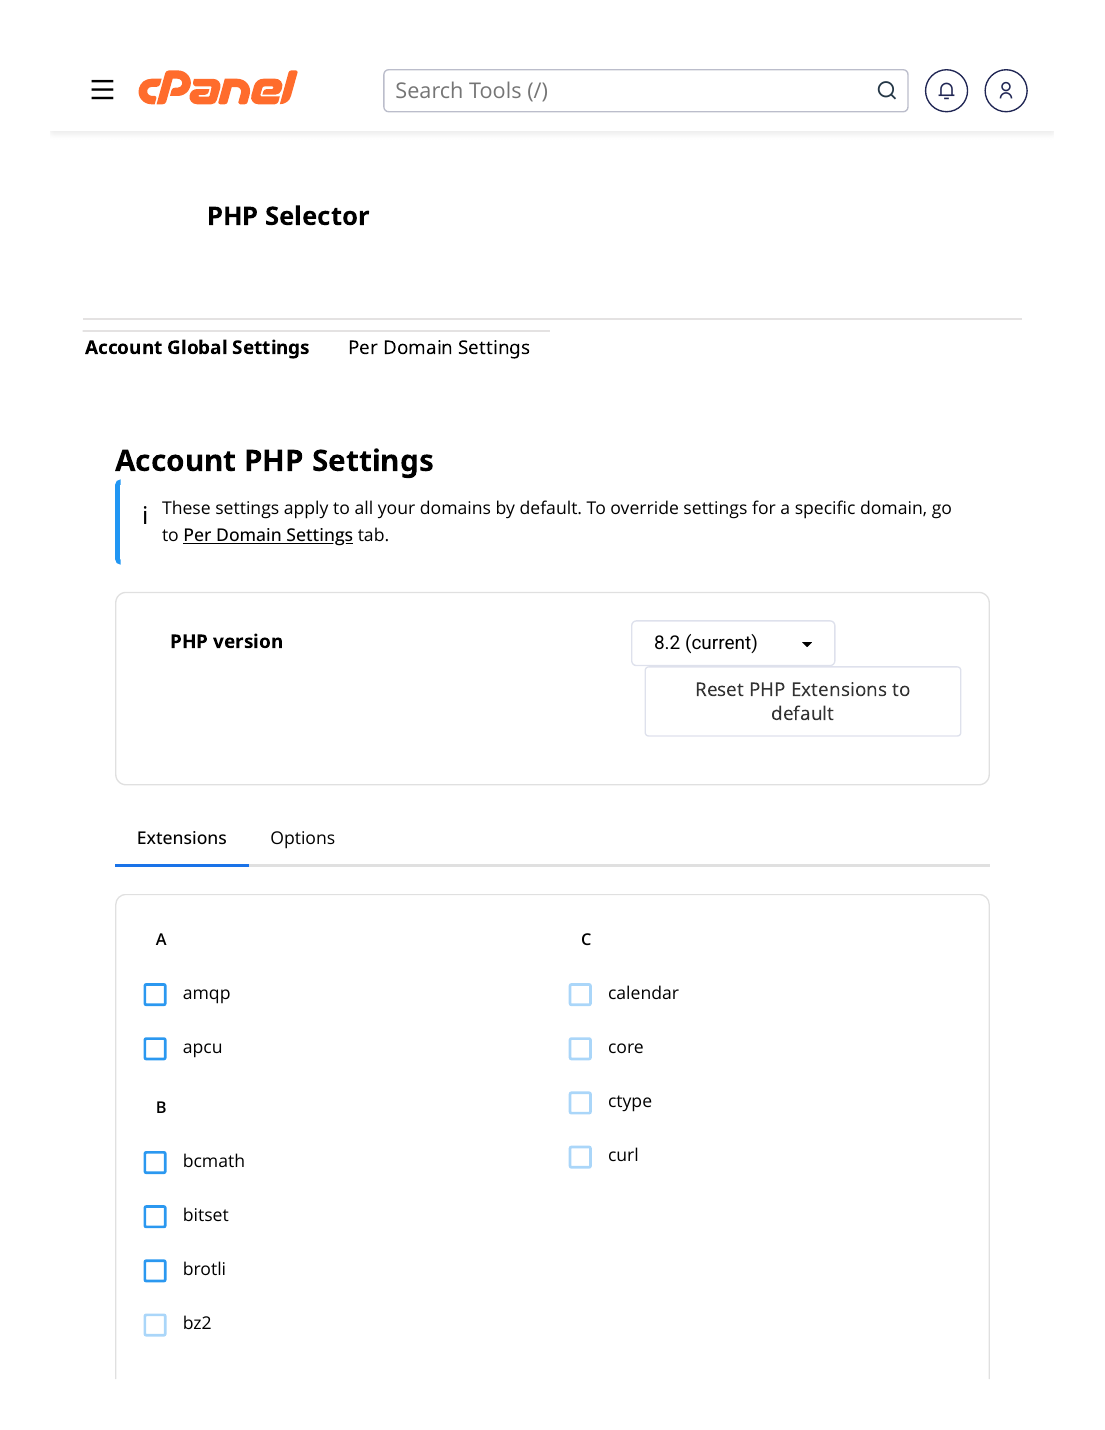
Steps
- Log in to cPanel.
- Scroll to the "Software" section.
- Click "Select PHP Version".
- Open the "Current PHP version" dropdown at the top of the page.
- Choose the version you need — for example 8.2.
- Click "Set as current".
✅ Result: The page now shows your new current PHP version, and your websites start using it immediately. Open your website and check that everything loads normally.
Good to know
- The Extensions tab on the same screen lets you switch PHP extensions (such as mysqli, curl or zip) on and off. If a plugin complains about a missing extension, enable it here.
- The Options tab controls PHP limits such as memory limit and upload size.
⚠ Common mistakes & fixes
- Website shows errors right after the change: an old theme or plugin may not support the new version. Switch back to the previous version (same steps) and update the theme/plugin first.
- Changed it in MultiPHP Manager instead: that is a different tool. For your account's main PHP settings, always use Select PHP Version.
- WordPress still reports the old version: wait a minute and refresh — and make sure you clicked "Set as current" after choosing.
Related articles
- How to Increase PHP Limits (Memory, Upload Size, Execution Time)
- How to Log In to cPanel (3 Ways)
- How to Install WordPress in 1 Click