
Your hosting includes free SSL certificates from Let's Encrypt. Installing one takes about two minutes in cPanel — and it covers your domain together with its www, mail and webmail subdomains.
✅ Before you start
- Log in to cPanel
- Your domain must already point to our server (nameservers ns1/ns2.my.zedgehost.com, propagation finished) — Let's Encrypt verifies ownership by visiting the domain, so DNS has to lead here first
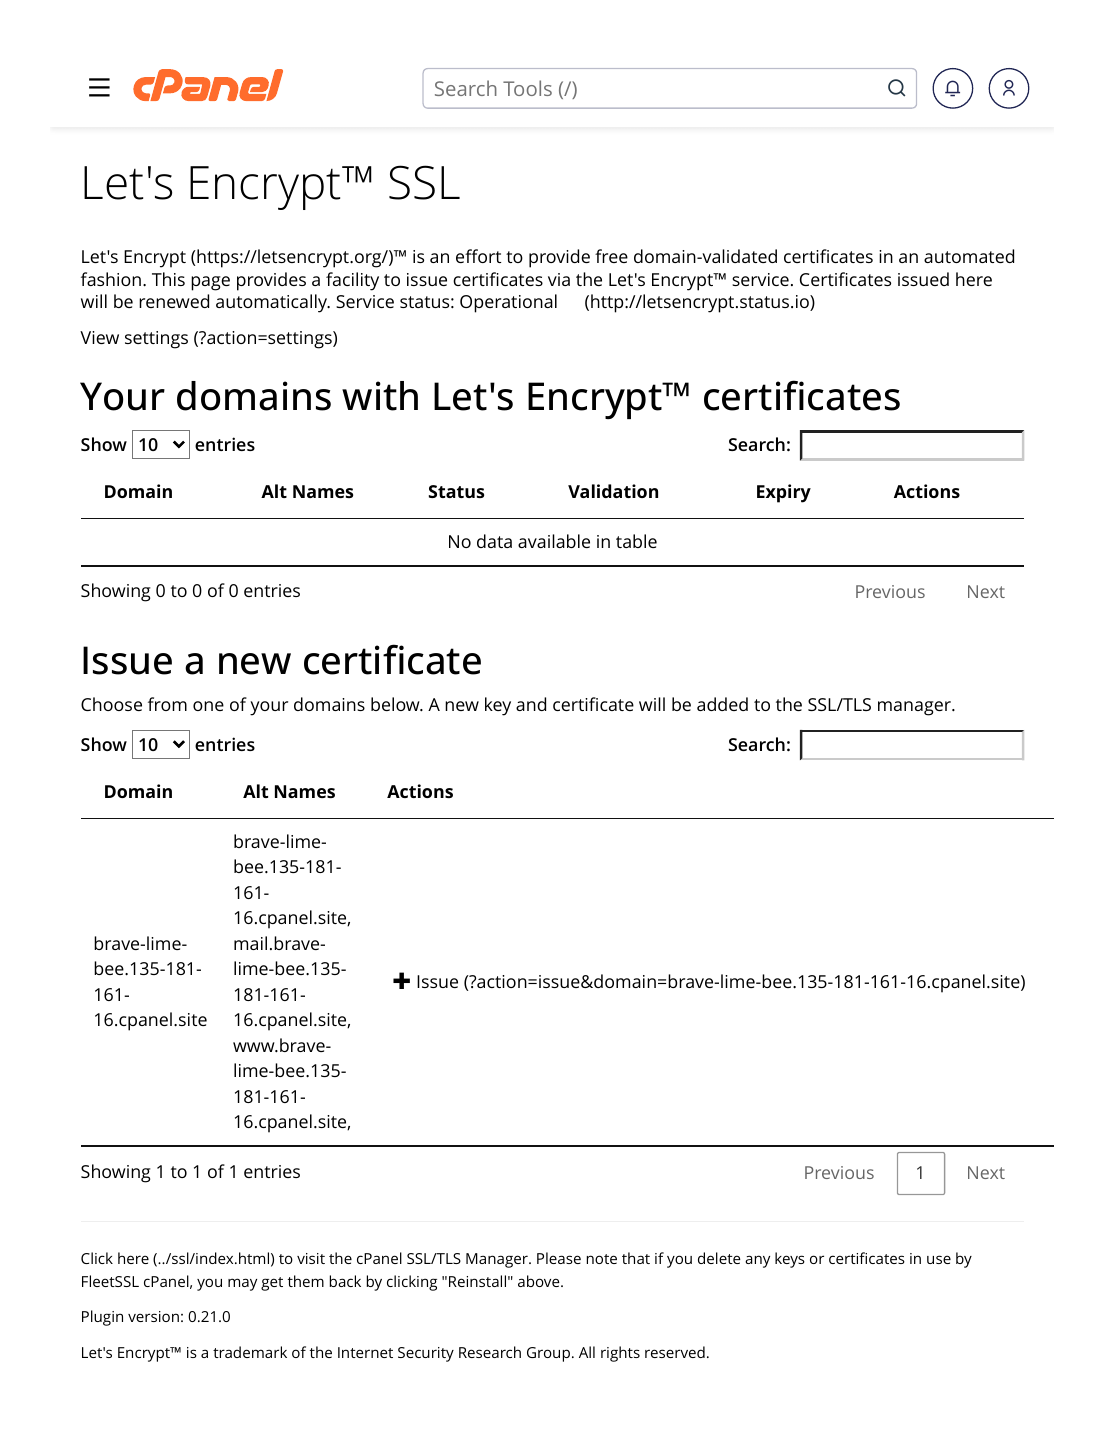
Steps
- Log in to cPanel → Security section → Lets Encrypt™ SSL.
- Find your domain in the "Issue a new certificate" list.
- Click "Issue" next to it.
- Choose the names to include — keep the offered set (your domain plus the www, mail and webmail subdomains, using the http-based check).
- Click "Issue" to confirm and wait a few moments while the certificate is created and installed.
- Test it: open https://yourdomain.com in a private browser window — the padlock should appear with no warnings.
✅ Result: Your site now loads securely on https. The certificate renews automatically while the domain keeps pointing here, so there is nothing to babysit. Final step: send ALL visitors to the secure version — see "How to Force HTTPS".
⚠ Common mistakes & fixes
- "Issue" fails with a verification error: the domain doesn't point here yet, or DNS is still propagating. Fix the nameservers, wait, and issue again.
- Padlock shows, but with a warning: the page itself is secure, yet something on it loads over http — that's mixed content; the fix guide is linked below.
- Certificate installed but site still opens http: normal — installing SSL makes https AVAILABLE; forcing everyone onto it is the separate redirect step in the next article.
Related articles
- What Is SSL & Why Your Site Needs It
- How to Force HTTPS (Redirect http to https)
- How to Fix Mixed Content Warnings